
If you’re new to computer vision and image processing, you may have heard of the term “contouring” but aren’t quite sure what it means. In this blog post, we’ll take a look at what contouring is, why it’s important, and how to implement it using the OpenCV library.
First, let’s define what we mean by contouring. In image processing, a contour is a sequence of points that define the boundaries of an object in an image. Contours can be represented as a binary image, where the object of interest is white and the background is black. Contours can be found using a variety of algorithms, but the most common ones are based on the gradient of the image, such as the Canny edge detector.
To use contouring in OpenCV, we first need to install the library. OpenCV can be installed using pip by running the command pip install opencv-python .
Once we have imported OpenCV, we can start by reading an image using the cv2.imread() function. This function takes the path to the image as an argument and returns an image object. For example, to read an image called image.jpg, we would use the following code:
import cv2
image = cv2.imread("image.jpg")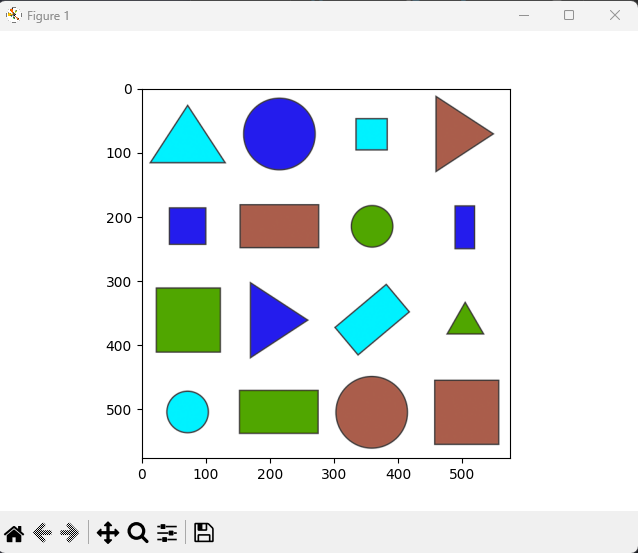
Now that we have our image object, we can use the cv2.Canny() function to detect edges in the image. The cv2.Canny() function takes three arguments: the image object, the lower threshold, and the upper threshold. The lower threshold is used to discard weak edges, while the upper threshold is used to keep strong edges. For example, to detect edges in an image using the Canny edge detector, we would use the following code:
edges = cv2.Canny(image, 100, 200)Once we have our edges, we can use the cv2.findContours() function to find contours in the image. This function takes two arguments: the image object and the contour retrieval mode. The most common contour retrieval mode is cv2.RETR_EXTERNAL, which retrieves only the outermost contours. For example, to find contours in an image, we would use the following code:
contours, hierarchy = cv2.findContours(edges, cv2.RETR_EXTERNAL, cv2.CHAIN_APPROX_SIMPLE)Now that we have our contours, we can use the cv2.drawContours() function to draw them on the image. This function takes three arguments: the image object, the contours, and the index of the contour to draw. For example, to draw the first contour on the image, we would use the following code:
cv2.drawContours(image, contours, -1, (0, 255, 0), 3)Finally, we can display the image using the cv2.imshow() function. This function takes two arguments: the window name and the image object. For example, to display the image with the contours drawn on it, we would use the following code:
cv2.imshow("Contours", image)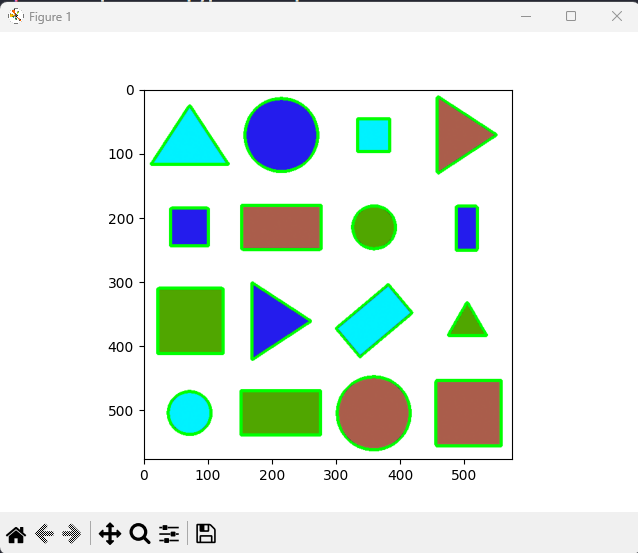
In the above image, I have used matplotlib to display my image. Matplotlib has provision for zoom in and zoom out along with axes for our comfort. This is a personal opinion, please go ahead with whatever suits you !
Implementation of matplotlib is simple. You have to install matplotlib using the command pip install matplotlib, Now here is the code to display image
import matplotlib.pyplot as plt

plt.imshow(image)
plt.show()
Checkout the complete code at my GitHub repository